Watch “There’s No Shame in a Half-rotten Log” – Episode 10 of The Farm Hand’s Companions Show right here, or read the corresponding post that follows below
Funny thing ‘bout logs half rotten,
I can’t put into words:
The pleasure they’ll provide me,
Whilst protectin’ all my birds
by Roddy Woods
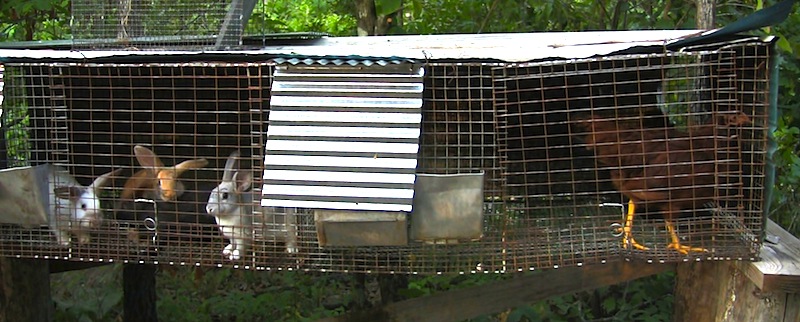
“All cooped up” pretty well described my livestock through much of the transition between our old farm in Tennessee and the new one in Arkansas. One of the small blessings in movin’ back here was the happy thought of buildin’ an even better chicken house … and that’s just what I’m plannin’ on doin’ … but not today. Right now I need a small, temporary chicken house that’s easy to build (in other words, quick) from my available resources (in more other words, cheap) and something that will protect a small flock overnight. So I hasten back to traditional farming for some ideas.
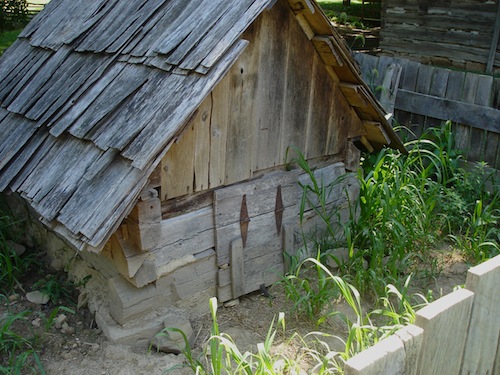
Few old examples of the kind of small chicken house I’d like to build still exist today, since farmers back then probably ran into the same thing as me: They needed something quick & cheap.
However, quick & cheap doesn’t always have longevity. Well, things don’t have to exist forever to be functional and useful, and I believe I can build something functional and useful pretty quick. There’s a time to build well—and a time to build quick and functional. A good farmer learns when to build what (or what to build when). As I often tell myself when on the front edge of beginnin’ a project: “It doesn’t have to be perfect; it just has to be”.
Since the land for our new home and farm has been cleared we’ve had a few logs layin’ around in various stages of decomposition. I’ve used a lot of ’em for diverse things and then others weren’t gotten to quick enough, renderin’ ’em useless … except for buildin’ a quick, small chicken house with.
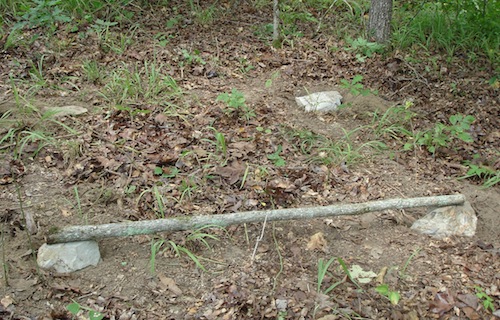
I picked a shady, half-wooded spot to build it on and after clearing some brush I set four corner stones firmly in the ground. Then, with a sapling for a straight-edge, I used a level to make sure the tops were roughly even.
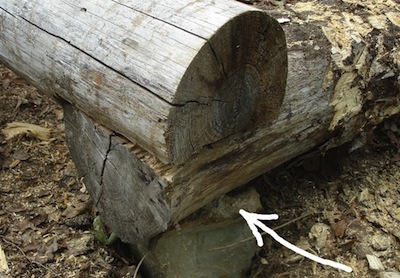
The bottom logs were notched on the underside makin’ sure the first course of logs would be level.
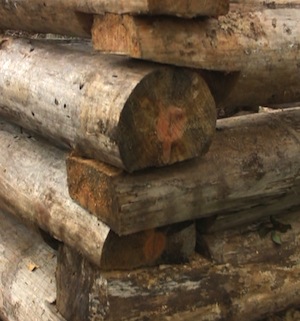
Once I was satisfied with a level first course I was ready to set the rest of the logs using half notches cut on the underside, upper side or both. This is probably the least desirable type of notch for log structures for at least a couple reasons. For one thing, it’s not a good idea to have any notch on a log structure facin’ upward. They shed rain better when turned down, rather than havin’ moisture sittin’ on a flat surface and not able to run off quickly. The other consideration is how easy it might be for the log walls to be knocked out from each other from the inside. You know, cows don’t always look where they’re goin’; and most times, they don’t care what’s around ’em if they’re bullyin’ each other around. For this little chicken house, though, half notches are just fine, since it’s a good notch for joinin’ logs that have varying diameters (and because chickens don’t throw a lot of weight around when they’re bullyin’).
To figure the depth of the notch cuts between two courses of logs I set a log in place on top of the log pair that it will be matched to, and measure the space between it and the log directly below it. We’ll call this measurement “X”. And let’s just say for the sake of illustration that the log I’m adding (the new one) is about the same diameter as the log it will be resting on. I simply divide X by 2, and remove that much wood off each log on both ends of the wall to form the notches. Then, when the new log is set in place, the length of the new log should meet along the entire length of the log below it, with the notches fittin’ each other right nicely. In reality, I make X slightly smaller than the actual measurement in order to have at least a wee bit of daylight between each of the wall logs.
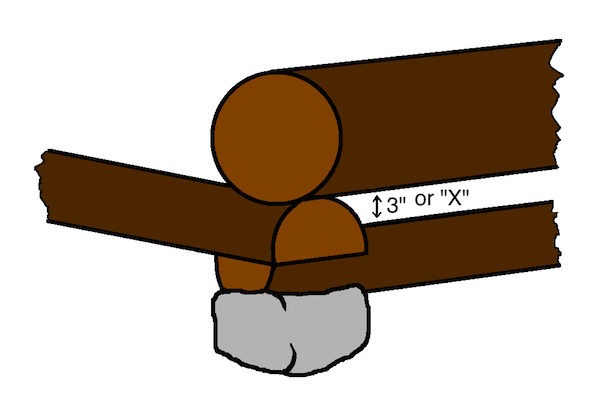
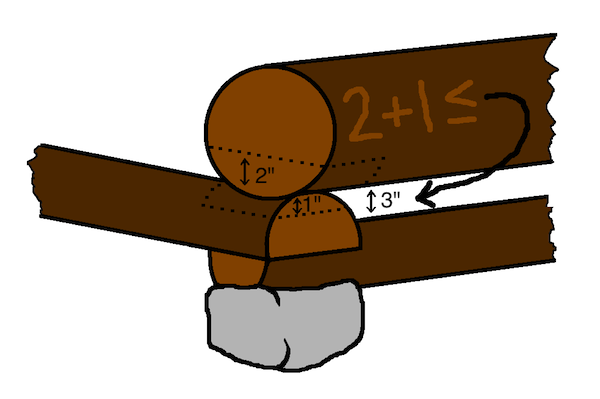
If one of the logs forming the notch has a bigger diameter I’ll make its notch relatively bigger than the other. But the sum of both notches needs to be less than or equal to X. Occasionally, when I’m adding a larger log to the ones preceding it, it’s only necessary to notch the entire X amount from the big one alone (i.e., if X is 3 inches, then I’ll notch 3 inches off both ends of the big log and its notches will rest on the top surface of the other two logs.
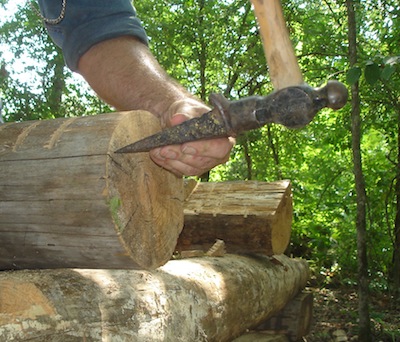
To cut out the notch, I score (with a chainsaw, buck saw, bow saw, or one man timber saw) down to the depth marked and chisel off the excess wood with a wedge, hatchet, or 2 inch chisel.
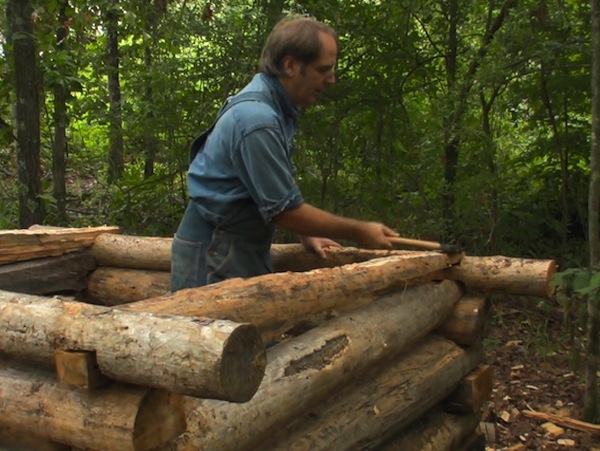
So on goes the work as I measure and fudge my way to the top. And with the top course, I really do some special fudgin’ with this little structure to make the back end of the top logs sit down into the rear wall. Doin’ it this way eliminates a large gap that would occur between the tin roof and the top log on the back. To achieve this, I score and trim off the top so that it slopes to the rear. This also will give the roof a slant from front to back that’ll make sure there’s just enough “pitch” for the tin to shed the rain.
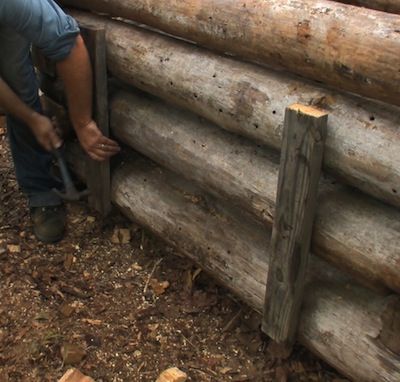
Before I put the tin on I really ought to cut a door or two out while it’s still convenient to do so. Scrap boards are tacked up on either side of where I want the opening to be. These will hold the logs in place while I cut out the door.
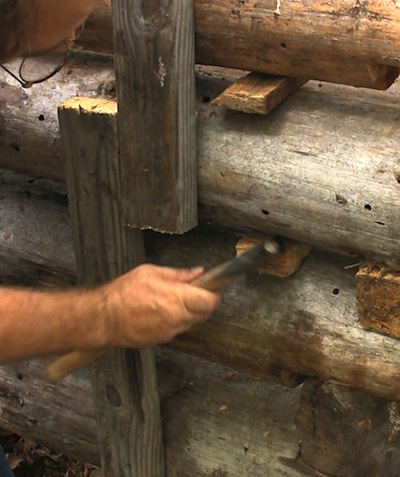
Waste wood left over from cuttin’ out the notches are already the perfect shape to act as wedges that help hold the logs in place while I saw out the openings.
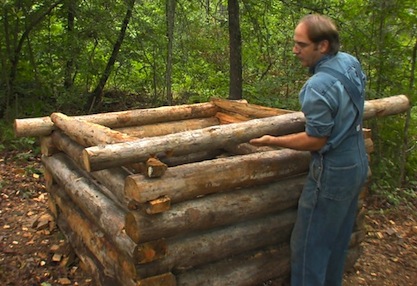
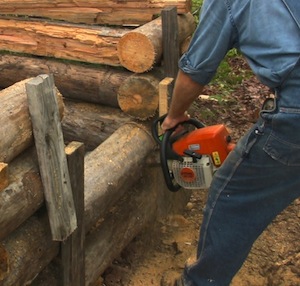
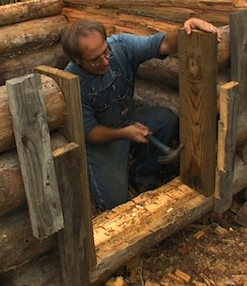
With the this larger door on the front wall, I’ll end up leaving the top most log uncut. That bein’ the case, I’ll temporarily remove it because I can cut the logs below it easier. I don’t want the bottom log completely cut through either, so I’ll only slice down part way and then score it to chisel away the top half (which will leave a nice, built-in threshold). Leavin’ the top and bottom log intact (at least most of the bottom log, anyway) makes sure the wall with this larger door is fairly stable. I’m real careful when cuttin’ door or window logs out with a chainsaw since the log will slip after one full cut, binding the blade. This can cause the saw to kickback if you’re not prepared for it. A couple of door jams are installed by nailing at least two big nails into each log. Then I replace the top log on the front, and remove the temporary bracing.
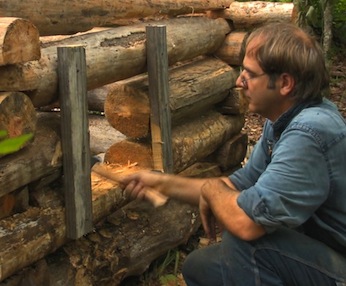
While I’m in a door-cuttin’-out mood, I’ll make another opening in one of the sidewalls for easy egg gatherin’ from nests.
Speakin’ of nests, with the roof still not on yet it’s the best time to put in two or three nest boxes (now mind you, I didn’t while the roof was off … but wished I had later … after contortin’ myself to get in there and do it after the fact). Just nail ’em up on the same wall as the egg gatherin’ window. My nest boxes are usually around 12 by 12 inches.
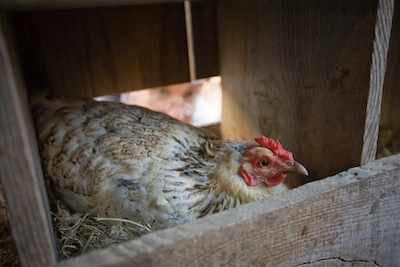
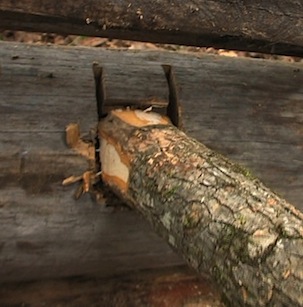
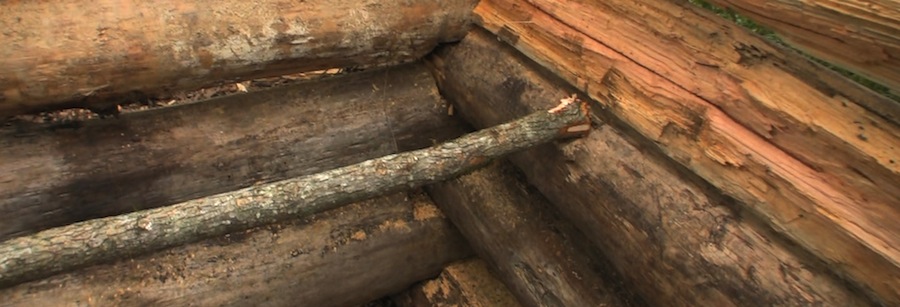
The chickens’ll sure need a place to roost at night, so there’s one more thing to do before we put the roof on: I’ll notch out a couple shelves on either side for a roost to “roost” on. An otherwise useless elm sapling is made useful, and by squarin’ off the ends with my hatchet it fits right nicely into the saddles I hewed on either side of the house. I tack it in place so jumpin’ chickens don’t knock it around. There’s one nice thing about elm wood: Since it doesn’t split well, nailin’ it near the end doesn’t cause as much of a split as it might in other wood types.
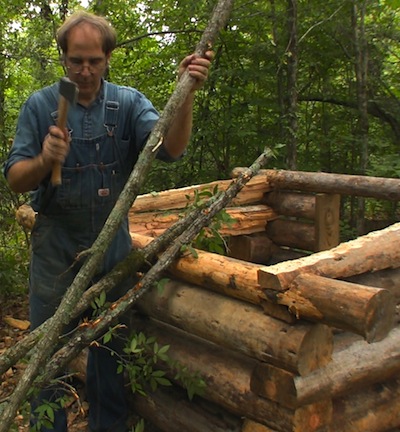
Now I can concern myself with stickin’ the roof on. Since this little roof won’t be bearin’ much weight, I’ll use three more useless elm saplings to double as both rafter and lathing.
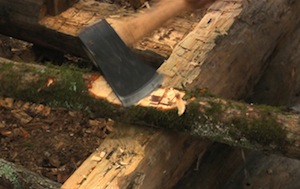
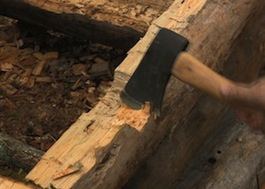
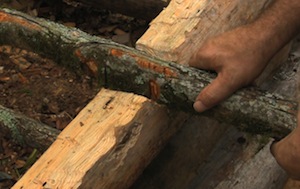
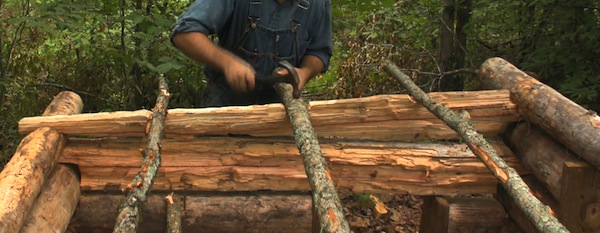
A wee bit of notchin’ on both the sapling and top log is in order now. With inset rafter and lathing, the entire length of the top logs on the sides can support the tin, too.
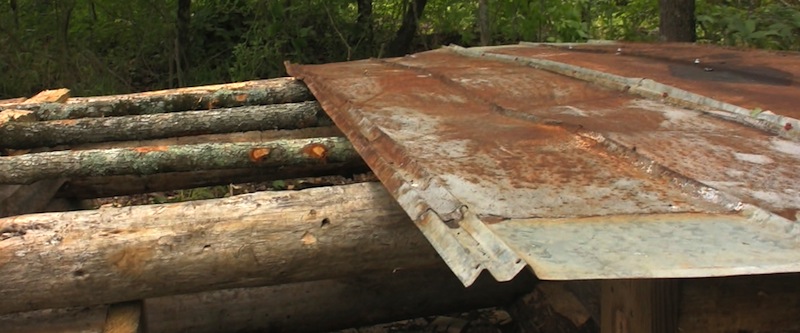
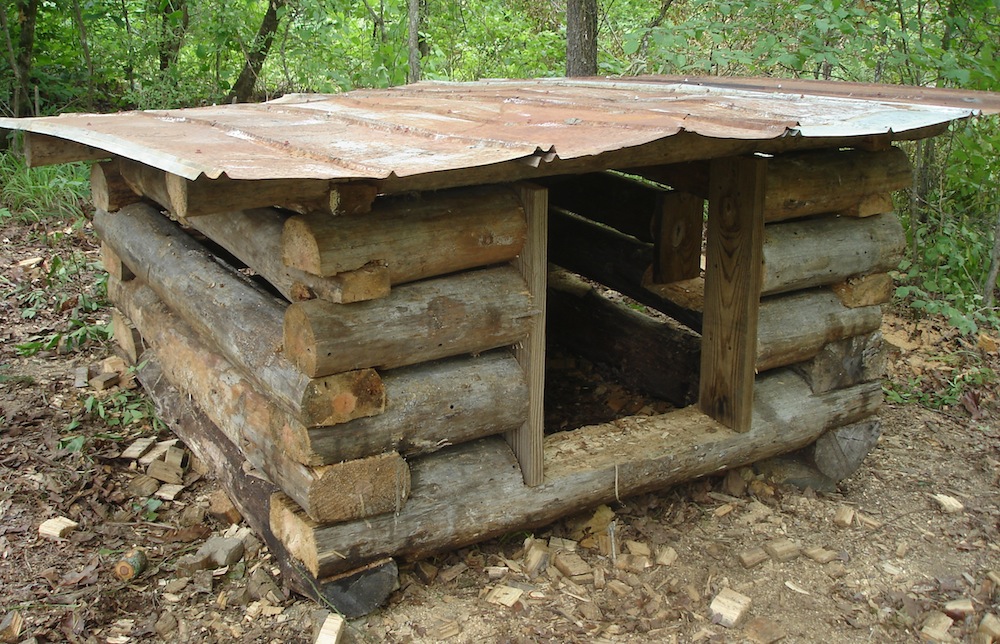
Once the tin is tacked on top, I believe we’re fairly well finished with the structure itself.
When people think of log structures they eventually give some consideration to the “chinking” (chinkin’) that fills up the gaps between the logs. I don’t know much about other places and customs, but around here and throughout much of the south, home dwellings were mainly the only structures chinked with mud daubing (daubin’). The chinkin’ was spread over scraps of whatever wood, sticks, etc. could be shoved, wedged, or tacked between the logs.
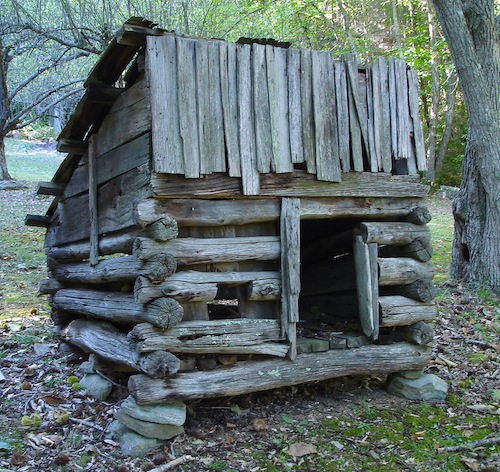
Wood scrap chinkin’ can be seen between the logs on this old chicken house, probably havin’ been the source of many a coon’s disappointing nights.
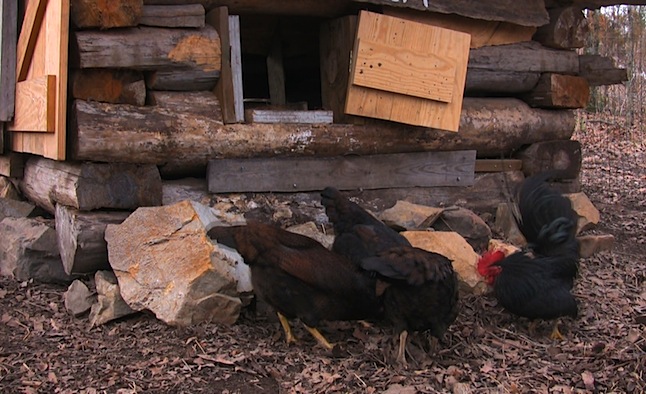
Many times livestock shelters, barns or other outbuildings made of logs were left unchinked. Then occasionally (for varying reasons) they were “chinked” with scrap wood, lumber, or even split shakes normally used for roofing (and probably the shakes that didn’t make the roof quality grade for one reason or another). These were normally tacked up across the log gaps from the inside of the structure. This was my approach for the little chicken house; not to keep cold wind out (though it does help), but to be a deterrent to little coon fingers reachin’ in and grabbin’ chicken feet at night.
Now are we all finished? Well, almost. I put plenty of big rocks all around the bottom of the little house, wedgin’ ’em in as tightly as I could. The bigger the rocks, the harder for a coon to move around. Stray dogs that have an affinity for chickens could possibly dig enough to jostle the rocks around and eventually get in, but they’ll be a while tryin’; which will buy me time to come to the rescue of my flock.
Now I thoroughly enjoy buildin’ things that have a good prospect of outlivin’ me. But there’s also the unexplainable joy … that comes from constructing something quite temporary which fulfills an immediate need. Although I’d never build a large structure with half-rotten logs, the quick work on a small project like this little chicken house can bolster a person’s knowledge, confidence, skill, and speed, and also prepare ’em for buildin’ things bigger and better … and a bit more enduring. It’s also a good reminder that nothing we build in this physical world is permanent. That’s an alarming fact at first thought, but then should be a comforting one after a second or two of reflection. It renders us just a little liberty to try things and not be so afraid of the outcome, or anxious as to how long whatever we build will be useful. What’s quite certain is that my little chicken house won’t last forever, but it’ll be used well until it falls down or I tear it down. After all, it’s just a bunch of half-rotten logs and there’s no shame in that.
Posted by Pa Mac, article & photos copyright 2014, Caddo Heritage Productions
Shared on:
The Homestead Barn Hop
Clever Chicks Blog Hop
Arkansas WB Sunday Link-Up
The Backyard Farming Connection Hop
Tuesdays with a Twist
Down Home Blog Hop
The HomeAcre Hop
