Watch the tin roof and rough-cut pine walls going up on the pole barn workshop in episode 11 of The Farm Hand’s Companions Show right here, or read the corresponding post that follows below
A nice little coverin’
With boards and some tin,
Will protect my tools well
But can I get in?
by Rufus N. Lincoln
The “covering” of the workshop begins with the roof so as to get everything beneath “in the dry”. In times past a farm outbuilding like this would’ve been roofed with wood shakes that were split or “rived” by the farmer himself, with a long bladed “froe” which was struck by a mallet. I’ll save that kind of roof for a later project and bring this pole barn up to the 1950’s with a corrugated tin roof. I happen to have a mix of both new tin and salvaged tin from one of my old sheds I tore down before leavin’ Tennessee. Generally speakin’, sheets of corrugated tin of the type I’m usin’ come in 26-inch sheets of varying lengths: 8 foot, 10 foot or 12 foot lengths are common. However, the new tin is thinner and slightly narrower than the old stuff, but it’ll still keep the rain off.
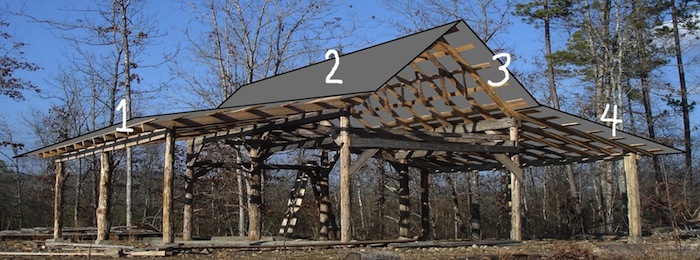
There’ll be four rows of tin laid on the entire roof. The middle pair of rows will cover the center truss section or loft area and will be comprised of 8-foot sheets of tin. The outer two rows on the edges will cover both side sheds and I’ll use 12-foot sheets on those. A ridge cap will cover the middle two rows at the peak of the roof, but sheets of tin cut lengthwise down the center then bent in half lengthwise would work, too. I also need a way to join the rows where the “pitch” of the roof changes. There are special “flashing” pieces produced and sold to accomplish just that, but I think I’ve got just the workaround.
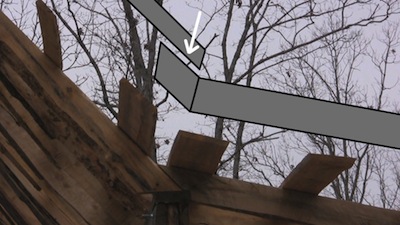
I’ll bend the bottom row of tin so the top row can overlap it. To accomplish the bend, I’ll fashion my own little bending “brake” usin’ my trailer, some clamps, and a few scrap boards. I want the bend to happen at about 9 inches from the end of the tin. One big board’ll hold the tin down with clamps while I bend the sheet with another board, by applying downward pressure.
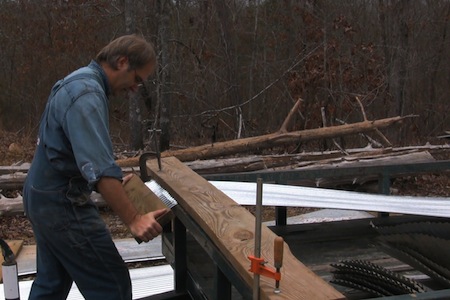
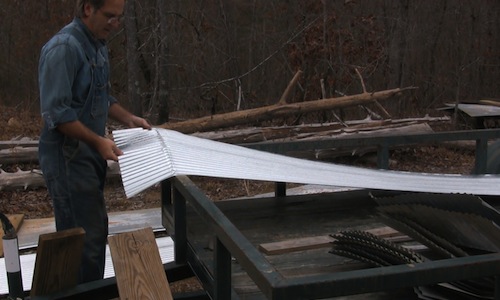
I have to go kinda easy on the bendin’, makin’ sure the motion is not so quick that it tears holes in the tin. I reckon it’s a good thing this new tin is a touch on the thin side. An organized system makes mundane tasks go much faster.
This 9 inch bend section added to about 9 feet 6 inches (the distance the rafter runs from the trusses down to the side shed sills) and then subtracted from the entire 12 foot sheet gives me about 1 foot and 9 inches of tin overhanging out away from the side shed sills.
I always like keepin’ rain as far away from a building’s walls as possible.
I believe I’m ready to put some tin down (I mean up). Well, actually I’m not. First, I’ll evenly trim the lathing on the side of the pole barn where I’ll begin installin’ the tin. “Which side is that?” you say? Well, many builders consider the best side to begin layin’ the tin is the one farthest away from the direction that prevailing winds, rains, or storms blow in from. More on that in a second.
Now I mentioned earlier how the tin will overhang across the two side sheds of the pole barn. I’m also goin’ to want some overhang on the gable ends. Starting the first sheet of tin where the edge of the first rafter hits at about the center of it would obviously give me about a foot of overhang at both ends of the structure. That’s fairly typical, but I like a little extra overhang. The more you have, the more out of the weather the wall boards are, the longer (in theory) the building will last. I always like keepin’ rain as far away from a building’s walls as possible. (I think I said that before.) So I’m goin’ to start the first sheets of tin with about 22 inches stickin’ out away from the edge of the first rafter and trusses (not including the 1-inch walls which’ll be added later). This’ll mean a little fancy dancin’ once I come to the other end to make it match this end. Though the tin will stick out from the edge of the wall about 22 inches, the lathing will end about 2 inches shy of this, about 20 inches away from the edge of the wall (which is why I left a little extra length stickin’ out over the edge when nailin’ the lathing down).
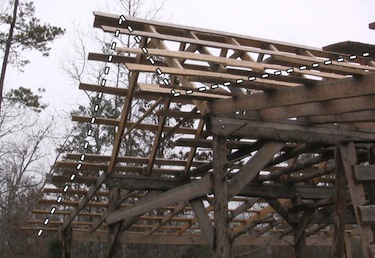
To trim the lathing boards even with each other all across on the starting side, I drive 8 nails 20 inches out from the edge truss or rafters on top of the topmost and bottommost lathing row for each of the four sections of tin. Stretchin’ a string between each sections nail pair I made a pencil mark across each row of lathing at the point where the string crossed it. If my edge trusses are plumb and I have no pole placement flaws (poles havin’ formed a parallelogram rather than a true rectangle when planted in the ground) drawin’ the marks in this fashion should yield four lines across each section of lathing that are in a perfect plane with one another. The edges of each lathing row can then be trimmed at the marks. [A chalk line reel can also be used for this, or else I could have put some string and black charcoal soot from a fire inside a can and shaken it well.]
And now we’re really ready for tin.
As I said earlier, the tin will be laid beginning on the side farthest away from the direction of the prevailin’ wind. Oh yeah, I was goin’ to tell you why: This way, the rain is more often goin’ to blow across the overlaps, rather than under ’em.
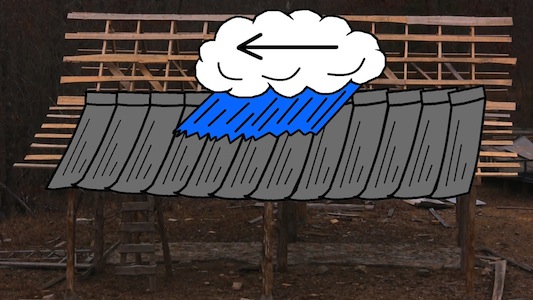
Each succeeding sheet will overlap the previous one by about a couple inches. So with 26-inch wide tin, you’re actually covering two feet of roof with every sheet.
Traditionally, tin was tacked down with nails and a hammer but screws last a little longer and a cordless screwdriver makes the work seem easier, at least. I use hex head, self-tapping roofing screws. These particular ones have small cupped washers on ’em with little rubber gaskets underneath to help keep the water out. The screws are drilled through the upper “crests” of the tin rather than the ditch-like “troughs”.
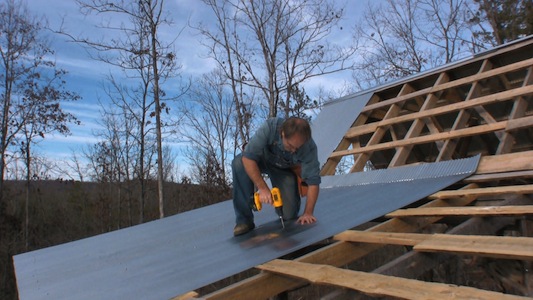
The first sheet on the bottom row or section of tin (over the rafters) is laid with its edge extending about a couple inches away from each lathing boards end. The same is done with the first sheet of tin on the second row (over one side of the trusses). Each sheet of tin on the bottom row is installed before each corresponding sheet on the top row, so that the bottom of the top section of tin overlaps on top of the bent 9 inches of tin on the first section. The ridge cap is screwed down last (only on the side I’m workin’ on) as the work progresses so I won’t have to climb back up here after I make it across. Before screwing down the next to the last sheet of tin on any of the 4 sections of the roof, I’ll lay down the last two sheets in place without screwing them in (I’m careful not to walk on ’em, though—that wouldn’t be wise). From the safety of a ladder I can observe and mark where the last sheet needs to be cut lengthwise to match the approximate overhang of the first sheet I put down way back at the start. I mark about where this will be, givin’ it just a hair of extra width by markin’ at the bottom of the next trough over. Back on the ground, I cut on my mark lengthwise down the center of that trough with an electric hand-held circular saw. Did you know that these saws’ll cut tin? Well, it may not be the best thing for my wood blade, but it’ll sure do it. I just be sure and wear some eye protection (and long sleeves don’t hurt when those small metal splinters go a flyin’. A 100 years from now I’ll sure give some metal-detectin’ grandkids a fit when they go explorin’ the spot where I cut this sheet of tin.) I’m careful when handlin’ tin to begin with, but rought cuts like these are extra sharp and aggravatin’.
Though it was set down and measured on the end of the pole barn, this narrow piece of tin will now become my next to the last piece of tin. That way I can overlap the last sheet of tin over the rough cut (which would look bad if exposed, not to mention rust before the rest of it). The last sheet should now extend in a manner that mirrors the overhang of the first sheet of tin on the other end. After screwing down the next to the last narrow sheet, I screw down one side of the last sheet where it overlaps the narrow one. Then I measure and mark where to trim the lathing on this end to match the other side (2 inches back underneath from where the edge of the tin will hit), saw it off on my mark, then screw the remainder of the last sheet of tin down. A little extra trouble, a little extra overhang, a little extra time before the walls deteriorate from exposure and rot. [Oh, and I save that extra piece of narrow, long tin I didn’t use. There’ll always be another use for it on the farm.]
Now, I repeat that whole thing for the other side of the pole barn (the third and fourth rows or sections of tin).
Since everything’s now “in the dry”, it’s time to turn my attention toward some walls.
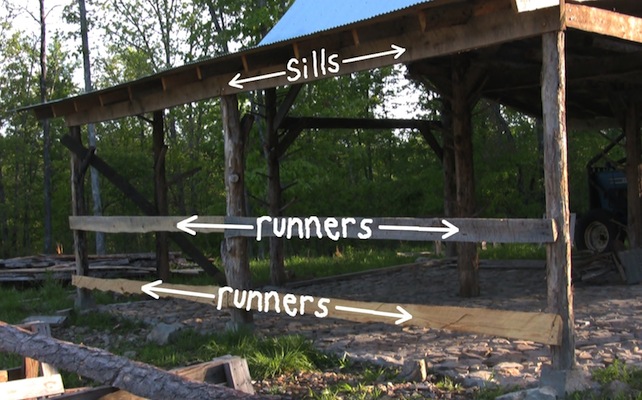
Vertical wall boards will be nailed to the sills at the top, or other horizontal “runners” wherever needed. Each runner can be made from a split or milled log or slab with the bark removed from its entire length, and its ends sculpted to fit the posts. The flattest and/or widest side of the runner will face outward to receive the wall boards. It’ll just look better that way from the inside. All of my walls have a middle runner to make the walls more stable and keep the boards from “bowing” out at their centers. A middle runner would ideally be best placed just there: The dead center between the top runner or sill and the bottom one. But since I’ll be usin’ this structure as more of a workshop than a barn for livestock purposes, I’ve got a little different plan for the middle runners. I may decide to have several “workbenches” against some of the inside walls. It’ll serve a double purpose to have these middle runners play as a support for the backside of the workbench. Takin’ this into account, I place these runners just a couple inches lower than my desired workbench height, which takes into account about a 2-inch thick workbench top. Good and sturdy for hammerin’ on stuff.
It’s helpful and possibly timesaving to consider where windows and doors will be located at this juncture of installing the runners. As far as windows are concerned, it’s not necessary to know exactly where the windows will be, just whether or not a particular wall will have ’em. If windows are desired on certain walls, I simply make sure the middle runner falls just an inch or two below where they’ll be located, avoiding complications.
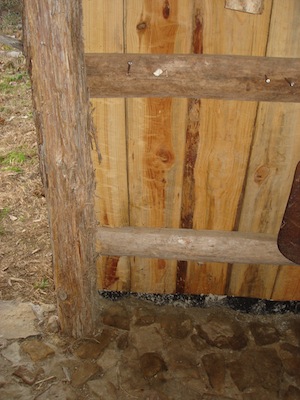
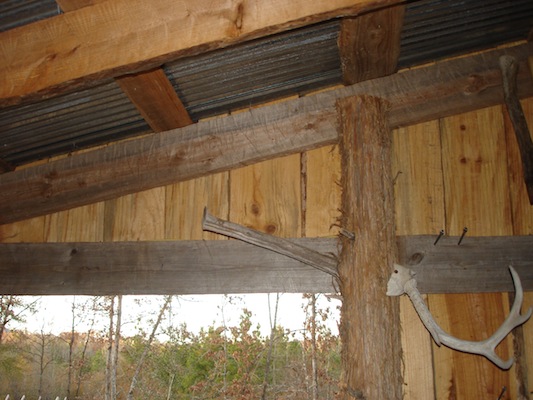
Doors need to have “dummy” posts set into the ground at this point in the construction (just far enough to make them stable) and nailed to the sills, rafter, or runners at the top. The bottom and middle runner will not extend across the door opening, but will terminate at the dummy post. As for door placement, I usually locate doors next to an existing post (side shed or inner post; doesn’t matter) for the simple reason of diggin’ and settin’ one dummy post per door as opposed to two. If you’re still not sure where doors will go, they can always be added later with the addition of a dummy post and the cuttin’ of middle and low runners.
The final thought for runners is the upper loft area, with the main consideration bein’ whether or not a loft door will later be installed on the outer loft wall. I’ll probably have an outer loft door on one side of the workshop and not the other. On the side with the door, I nailed up a runner that’s top is even with the top of the loft floor joists. This way once the door is cut, the shortened wall boards below the opening will have two runners to be secured to. With the other gable, I’ll probably install a window for extra light, so no middle runner need be nailed up there.
With several cants now ready for millin’ I start sawin’ ’em into 1-inch thick wall boards.
Usin’ small scrap sticks of wood to separate layers, I stack the newly sawn boards under the newly laid tin roof. This keeps the direct sunlight from dryin’ ’em out too quickly which would cause cracks and warpin’
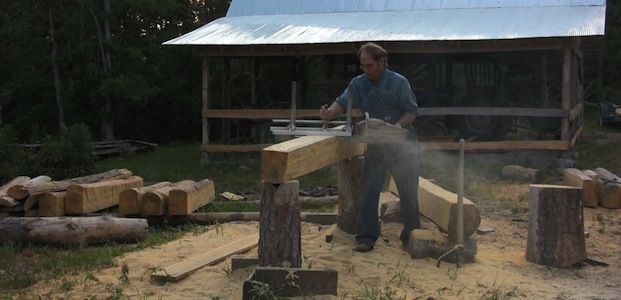
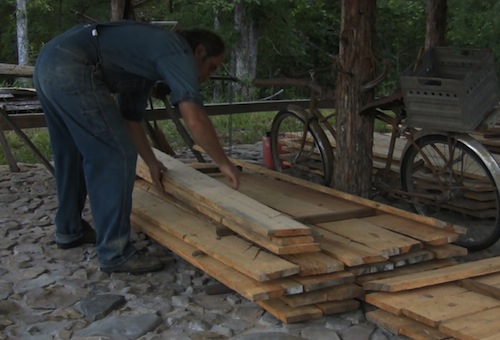
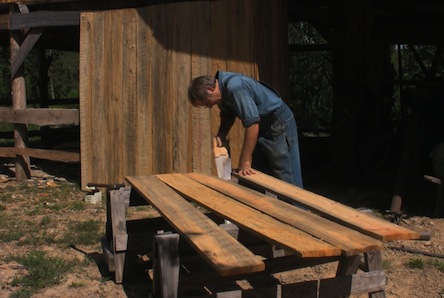
When puttin’ up wall boards I like to spread out as many of the planks as will nicely fit on my sawhorses, measure and mark the length needed on each one, and sawin’ ’em up afterwards. I’ve always gotten along better by measurin’ before I saw.
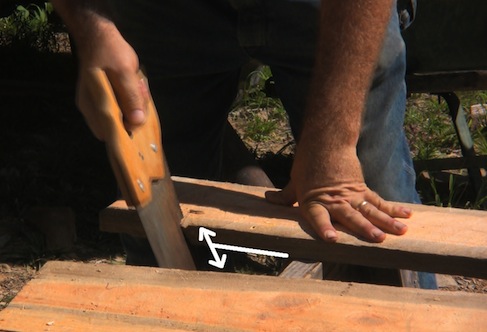
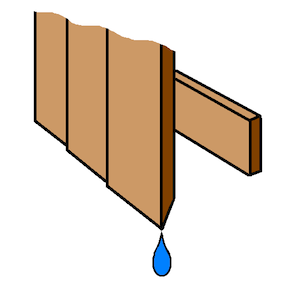
The end I saw will end up bein’ at the bottom of the wall, and will be sawed with an angled cut. This beveled edge directs raindrops off the boards quicker keeping the bottom of the wall from rotting sooner.
A hand-held circular saw set for a sharp angled cut works good, too if you have electricity and a tired arm. It’s good to keep wall boards nice and plumb, I guess, so I glance at the plumb bubble on a carpenter’s level ever now and then to make sure I’m not gettin’ too far off. Because of the imperfections of my lumber makin’, most of my boards wander just a hair in width from one end to the other. I simply use this to my advantage in correcting plumb variances as I go.
A couple nails through the wall board and into each runner is tol’rable.
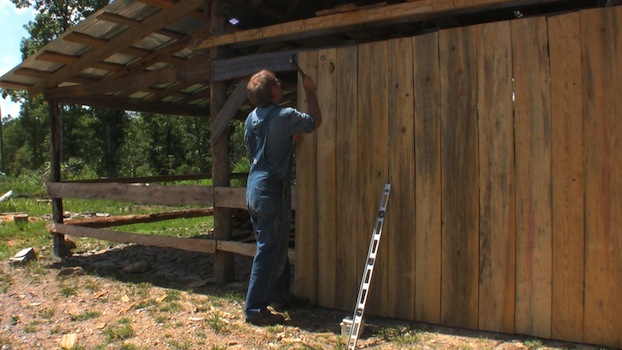
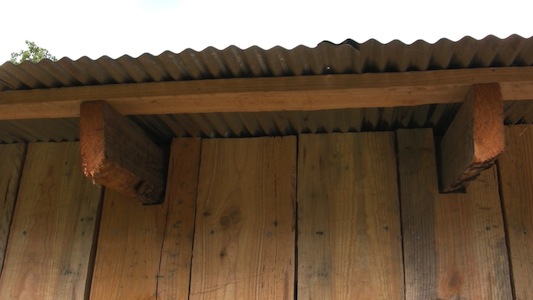
When walling up the side shed walls, ever’ third board or so will require a tad bit of fittin’ where it meets the rafter at the top. To fit to a rafter, I make three pencil marks: Two marks for the sides of the rafter, and another showin’ the rafter depth. Then it’s just a matter of sawin’ it out. On my design, I’m choosing to leave one of the side sheds open to the outside (more on all the different wall options later), which means I’ll have about a ten-foot wall to wall up. The top runner for this wall will actually be the top sill and plate that the trusses are restin’ on. I can measure and install these wall boards to meet the tin at the roof, or else save myself some trouble and have just enough wall board overlapping the sill to nail into it. I think I’ll save myself the trouble. It’ll be easy to leave the gap at the top for better air circulation in the loft, or if not, just nail up scrap boards to cover the gaps later.
On walls that will have doors, I simply nail up wall boards such that the last board before the actual opening will occur is even with the edge of the dummy pole. Lengthwise ripping of this last board is usually in order to make this happen. I’ll worry about the actual door later (just save enough boards to make it with). I’ll worry about the windows later, too.
Now that all the ground level walls are up, I can turn my attention skyward and begin wallin’ up the loft section at each gable end of the pole barn.
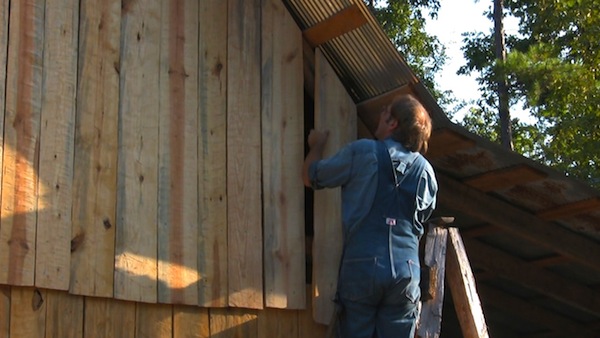
The bottoms of these planks are beveled the same as the lower walls, so I’ll cover the tops of my sawhorses with several more planks and saw that beveled edge on one end of each of ’em (which will be the bottom). Now, for the top end I’ve got to mark and saw the correct angle that will match the pitch of the roof. To find that angle I use a handy little gadget called a bevel gauge made for just such purposes.
Climbin’ up my ladder to the loft section with tape measure and bevel gauge on my person, I measure from the top of where the board will be situated down to where the bottom should go, well below the top of the ground floor wall (the bottom of the top wall will be nailed into the top of the bottom wall. If you wish, you can make the top wall reach completely up to where it touches the tin. You’ll have to trim around lathing boards ever few planks, which takes a little extra effort. I didn’t, because the extra one inch of space at the top would serve to allow the freer circulation of air, which is real handy in a hot loft in the summertime.
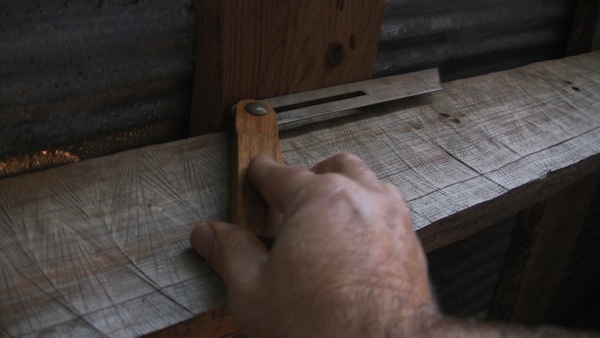
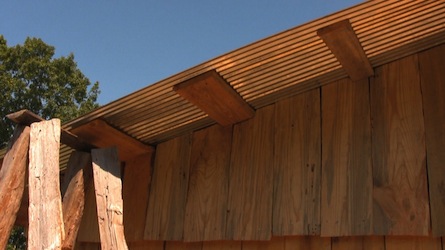
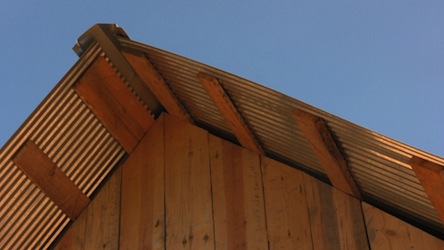
While I’m up there, I also set the bevel gauge with its metal edge conforming to the angle of the roof and its wooden handle as plumb as I can get it. Then I get down before I get plumb dizzy.
With the bottom, beveled edge of the boards lined up even on my saw horses, I measure from that end of the first board up to where it should meet the top of the roof and mark the length that I measured a moment ago. Then placin’ the bevel gauge with it’s highest edge on my mark, I draw the beveled angle from there on down, extending the direction of the angle across all the boards with a longer straight edge. If I’m worried I’m gettin’ off with each board, I just check each planks mark against the bevel gauge and redraw if necessary. Pullin’ my saw back out, I saw on my marks.
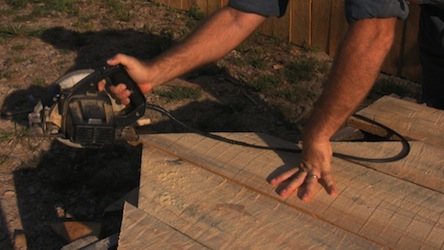
Now the part that gets sawed off…don’t stick it in the fire just yet, but turn it upside down and you might just find you’ll use it later as the boards you’ll later need will need to be shorter as you work your way across the wall. The angle should match just fine, you’ll just need to saw a beveled edge on the opposite end. Once I have two sawhorses full of prepared boards, I get a nail or two started at the top of each one, climb my ladder, and nail ’em up. The spaces between the boards’ll widen a little as the lumber dries out, but it won’t matter ’cause I’ll cover the gaps later with skinny strips of wood called battens.
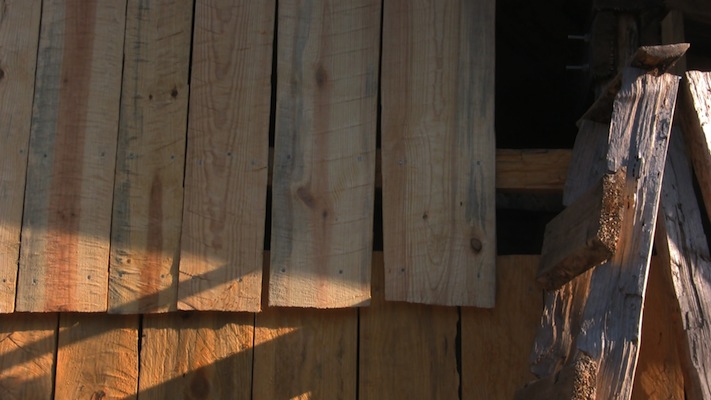
I’ll worry with the loft door and window later.
As for the corners of the pole barn, you can leave them as they are or do something a little more aesthetic like this: I’ll rip a narrow 4-inch wide plank for each corner, nailing it to cover the exposed edge of whichever walls first board had an exposed edge. You can also put two planks up for each corner for a more pleasing visual effect. Those are always good. The first will be nailed up even with and on top of one wall; the second will be nailed on top of the adjoining wall, even with the edge of the first plank. If it’s important that the appearance of the width of these boards be equal (say, four inches for both) them rip the first board to a 3-inch width, nailin’ ’em up the same way.
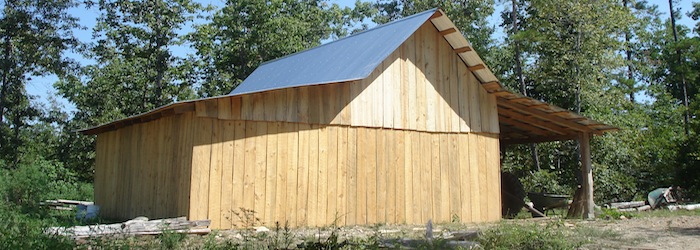
Seein’ walls go up is surely one of the most rewarding tasks of buildin’ in my opinion.
Posted by Pa Mac, article & photos copyright 2014, Caddo Heritage Productions
