Take a look at a simple way to turn timber into lumber … in episode 5 of The Farm Hand’s Companions Show right here, or read the post that follows below
There are two basic ways that lumber can be made: sawing or splitting. But successful lumber splitting requires long, straight-grained timber with a minimum of knots that tend to interrupt the split. This was easier done in the last century with the abundance of so much old growth pine that had populated the woods of the area where I live. It could still be done today with the relatively more knotty timber; but hatchet, broadaxe, or adze trimming would take more of my time and labor. I may yet attempt it in future outbuildings (maybe something not so large), but for the new pole-barn style workshop I’ve recently begun, I’ve chosen to saw the lumber. So the best option for me right now is to turn my chainsaw into a portable sawmill with some simple attachments. With so many harvestable trees close by, it makes sense to take them from log to lumber right here on the property.
I felled the trees back in February before the sap started rising. Although they’ll dry out (or “cure”) in time anyhow, the less water in ’em the better. They just don’t seem to twist as bad as they cure when they don’t start off with as much moisture. When bucking the logs I cut them in lengths just 3 to 6 inches longer than the length of board I knew I’d need. With some careful planning and aforethought, very little wood in a board need be wasted with this homemade method of acquiring lumber. And truth be told, that’s probably my favorite aspect of the whole deal.
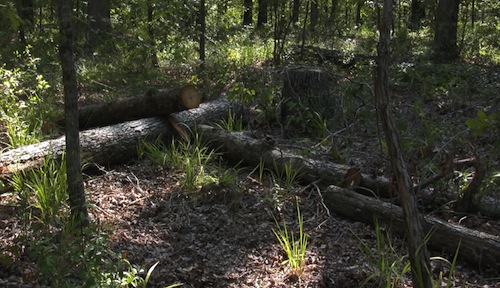
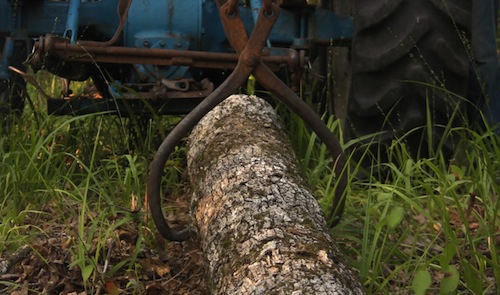
Even though I could take the chainsaw mill to the trees I’ll bring the logs up to the worksite for convenience. Dragging logs, whether with draft animals or machinery, is called “skidding”. Until I get some draft animals out here, these log tongs or “grabs” are just the thing to turn my tractor into a skidder. (Note: Skidding logs with a 3-point hitch boom and grabs in this manner can be quite dangerous, however, should the log catch onto an unseen object, flipping the entire tractor over backwards. This is a good time to remind my readers and viewers that I don’t do safety manuals or safety training videos; I’m just a simple man showin’ folks how Pa Mac does his own things his own way. All free people are masters of their own safety, and responsible thereunto.) The challenging part is attempting to hook, skid, stack, and unhook the logs without getting out of my comfortable tractor seat—and it can be done with these grabs believe it or not. Rewards soon come to me with just a little bit of practice.
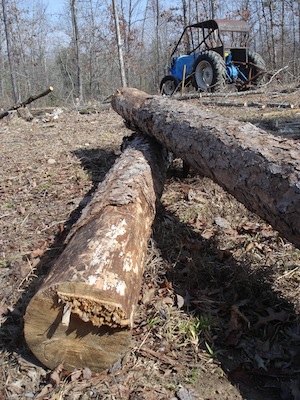
With a pile or “set” of logs now waiting near the site of my future workshop, the first step in milling is cutting the logs into “cants”. Cants are logs that have been squared off and are ready for sawing into lumber. To do this I use a simple device that easily bolts to the chainsaw. It acts as a guide riding a 2 x 4 that’s fastened to the log with 3 inch screws. Once one pass is made, I turn the log, refasten the 2 x 4, and make the next cut. The log is set up on some notched sections of firewood-sized logs to make sure my blade doesn’t saw into the ground (or my foot).
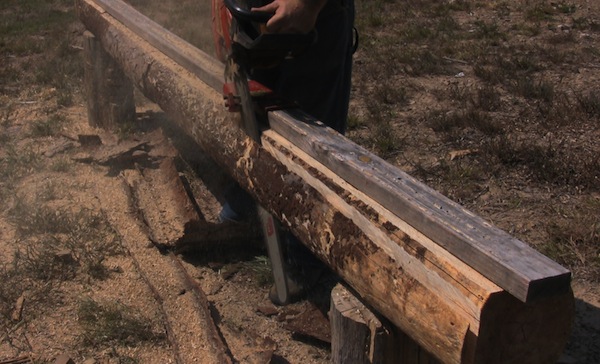
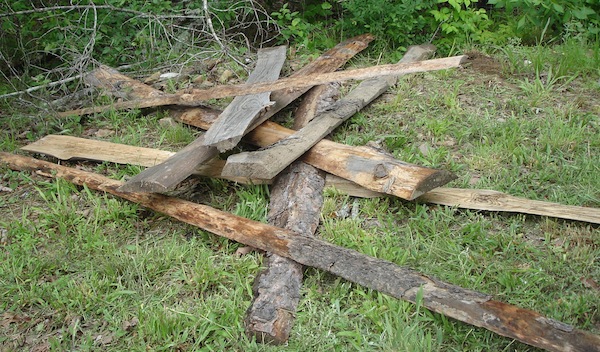
The resulting sides that come off the log are obviously flat on one side and rounded on the other. They’re called slabs, and at some point down the road I’ll demonstrate several things that can be done with ‘em. Given that they’re mainly composed of inner bark and not the more desirable, tougher heartwood, they aren’t the choicest cuts of the tree. But needless to say, I won’t be throwing them away, and I’ll typically end up with 3 to 4 good slabs for every log I cut.
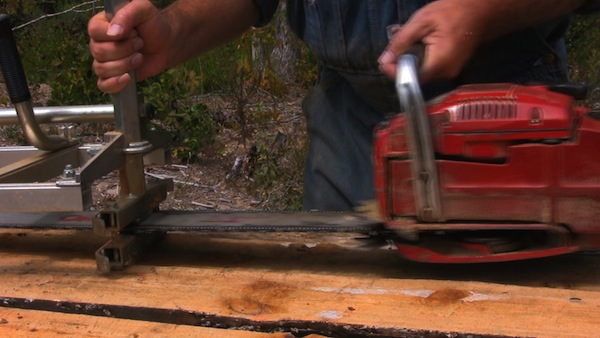
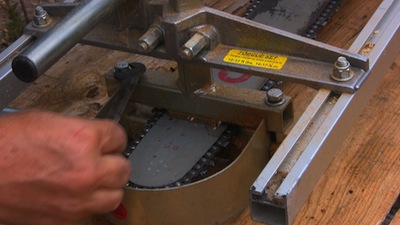
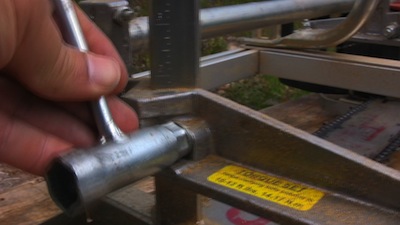
After these initial cuts, I take the first attachment off and install the next attachment that’s used to saw the lumber. Fastening this second attachment to the saw is also quite simple, with only 4 main bolts that tighten to the bar of the saw using pressure only (no holes need be drilled in the bar). The last adjustment involves 4 other bolts and determines the thickness of the lumber by setting my mark on a ruler that’s etched into part of the metal assembly.
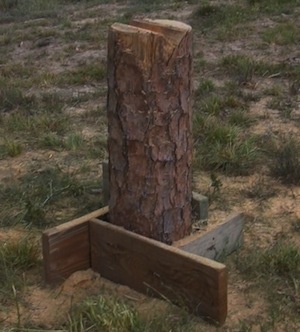
Finally, I need a couple of homemade supports notched to hold the logs up at a comfortable height that saves my back. I used a couple of about 4 foot high sections of a pine tree that was a bit knotty and crooked—so no great loss there. The bottom is reinforced with scrap 2 X 8 or 10 or whatever you might have lying around. This (hopefully) keeps the whole thing from tipping over while I’m sawing. To get my heaviest logs up on top of them I use the tongs, boom, and tractor again, being extremely careful and cautious when anywhere near a lifted up log. Anything can happen with two very small points of iron holding a log up 5 or 6 feet above my legs or feet. At some point down the road, I’d like to build a very sturdy overhead beam rigged with block and tackle to lift and place the logs by hand. The less I use my tractor the longer it will last. I hope.
Now, I’m finally ready to saw the cants up into lumber.
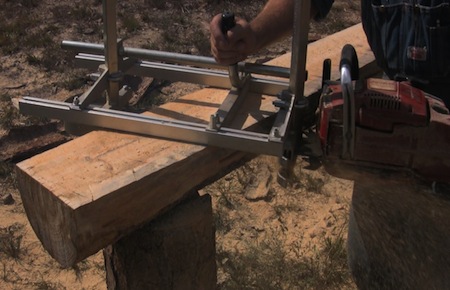
Because of the quarter-inch wide chain, chainsaw milling produces more sawdust than other types of sawmills. I suppose no method is only pro and no cons, but I did manage to use the sawdust some for bedding when brooding a few chicks in a cardboard box. It’s also good to drop on oil spills but I hope I never have an oil spill big enough to use all the sawdust I have. That would be quite a spill.
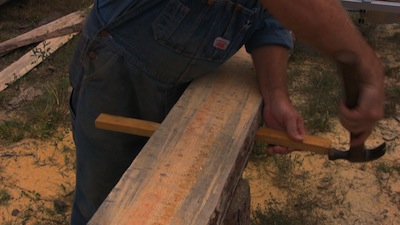
While sawing, I keep some wood wedges close by to keep the weight of heavy boards from pinching or “binding” the saw. I keep alternating and moving them down as I get toward the end of the board. Once you get the swing of it, things move along right quick.
I wish I had taken more notes as to exact times it took to mill certain boards, fuel usage, sharpening, etc. I could go back and time the video; I may just do that.
But for now, here’s my best guess:
For the 12-foot pine boards, I figure with normal sharpness of the chain it took about 2 to 3 seconds per inch to cut. That’s about 5-7 minutes per 12 linear feet, which is probably about right. Seems longer, though, when you’re choking on fumes and sawdust and it’s burning up hot outside. Figure on oak or other hardwood taking about twice as long.
Each cant produced about 2 or 3 two-inch boards (actually I was cutting 1 and 3/4 inch boards, since 2 inch seemed too thick and 1 and a half inch too narrow) and about 5 to 6 one-inch boards, in addition to the left over slabs. For pine I ended up resharpening the saw after about 6 passes, and needed refueling about every 5 or 6 boards (although I tried to refuel before completely empty so as not to have to refuel in the middle of a pass; I emphasize the word “tried”). Again, for hardwood, add to all that. Don’t hold me to this either, but it seems like I needed a new chain about every three or four (maybe more) stacks of lumber (like the ones you see pictured). Sometimes I used the chains until there was almost nothing left; other times I pulled them off before completely worn and put on a new one (new chains cut lumber much faster) setting the worn one aside for firewood cutting in the fall.
If you have an indoor area to stack fresh cut lumber, I would. But I didn’t.
My next favorite way of storing lumber (outdoors) is an A-frame style of stacking against both sides of a horizontal beam, or even one side of the edge of a building. With this arrangement I can see which board is longer (if you have differing lengths) and I can grab any one of them without disturbing the rest; not so if they’re stacked on the ground in layers.
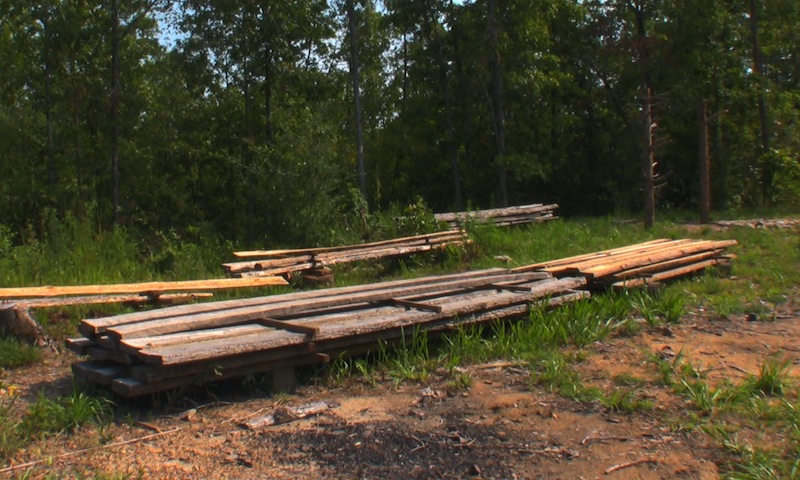
But having said that, I still stacked mine on the ground in layers; only because I was going to be using them sooner rather than later. It’s good to divide the layers with smaller sticks or boards to allow for air circulation between each row of lumber. It’s also a good idea to keep them out of the direct summer sun, since that dries them quicker, and usually causes them to crack more (not terribly…just more). However I wouldn’t put them directly under trees or anything that would keep them from drying out soon enough after a rain. Later on after I have a roof on the workshop, I’ll be able to store the wallboards inside the workshop out of the sun and rain.
Work breaks come in the form of gasoline refills, bar oil refills, and endless chain sharpening. I kept a couple sawhorses with boards across them set up near the milling operation with my chainsaw toolbox right there close. At just the right height, it saves my back quite a bit and allows me to work on the saw with little or no discomfort. It’s a sharpening and refilling station of sorts; and being in the shade with my water jar handy made it a desirable place to be.
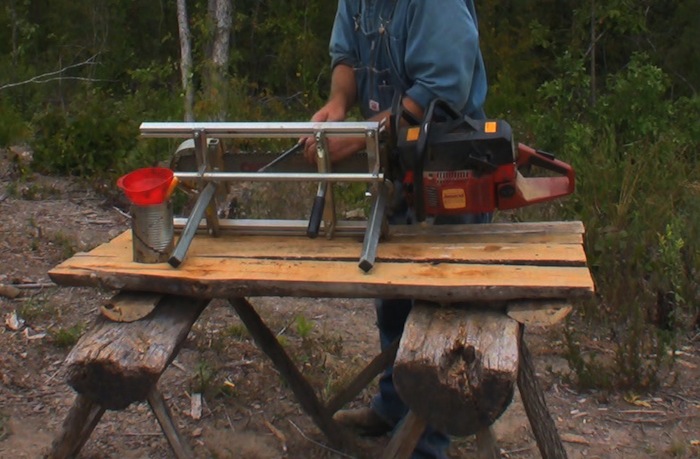
As far as the chainsaw goes, I prefer a powerful saw operating at medium intensity over a weaker, smaller saw going full throttle. And keeping the chain sharp—no matter how much longer it takes me to stop and sharpen—actually saves me time though it might not seem to. When the sawdust is fairly course, I know the chain is sharp; when it’s fine the chain needs some file attention. There are some pretty nice looking motorized sharpeners out there, but I managed to do the trick with just a simple round file and a good holder for it. A lot of people have written about the proper way to sharpen a chainsaw so I won’t go into a great amount of detail. But I will mention a few things about the matter that have helped me most:
1) I try to keep the exact same angle of the file when filing each tooth of the saw. There are little diagonal lines on each tooth that show a typical good angle. If you deviate from that angle for whatever reason, you can still use that little line as a guide.
2) I keep the same pressure on each tooth, mainly pressing toward the rear of the tooth and just a hair upward, but never downward.
3) If my saw is very, very dull, I sharpen each tooth with 3 firm passes of the file; if it’s very dull…2 passes; touch up…1 pass. I also count the number of teeth for each side of the saw and memorize it; then I count each tooth as I’m filing it so that I know when I’ve done them all on one side.
4) When the life of my chain is drawing to the end and there’s not a lot of “biting edge” left on the teeth, I take a flat file and file down the “drags” between each tooth (the part that’s not sharp and sticks up). Don’t go crazy with it, though. Just one pass for each drag will do. I wear gloves when sharpening, but particularly when filing the drags. Slicing off a piece of skin from my thumb once taught me that in a way that’s been hard to forget.
I won’t lie to you; chainsaw milling does take a goodly amount of gasoline, bar oil, and new chains to get serious board footage of lumber. But considering the trouble, expense, and hassle of needing to involve others in the log hauling, sawing, hauling and stacking of lumber, etc., … I liked the tradeoff very much. (I also kept my old chains and will use them as reinforcement in my small concrete projects around the farm; I know, it’s a small thing, but every bit counts.)
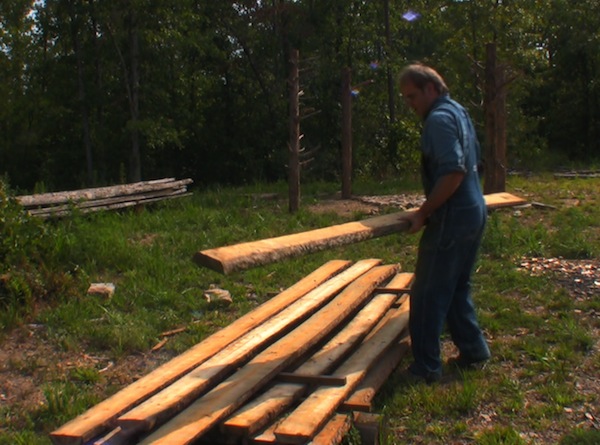
Though the work is intensive, the satisfaction of sawing my own custom lumber makes the hard labor well worth the effort.
Now that’s farmin’.
posted by Pa Mac, article & photos copyright 2013, Caddo Heritage Productions
Also shared on:
The Homestead Barn Hop
The Backyard Farming Connection
Simple Living Wednesday
The HomeAcre Hop
Down Home Blog Hop
Simple Lives Thursday
Frugal Days, Sustainable Ways Blog Hop
From the Farm Blog Hop
